Showing posts with label Saving. Show all posts

How To Make Home-Made Butter

Wednesday, June 15, 2011

picklewart.blogspot.com

My friend Sarah over at Faded Country shared with me how to make butter using a mixer. Well, bless her heart, she did it with a hand held mixer, but I was lucky enough to have a stand mixer... and it worked GREAT! So, here's how it goes:

Get some real cream, I prefer to use the cream off a raw whole milk if I'm lucky enough to have a "fatty" batch! Pour the cream (maybe after carefully scooping if off the settled milk) into your mixing bowl. Closer to room temperature is preferred and will cut down on your "churning" time. I think fired up the ol' Kitchenaid to almost high using the whisk attachment.

It whisked and whisked and whisked for probably 20 minutes before it finally began to separate. The curdles are what will be the butter and the clearer liquid is what is considered buttermilk. You'll keep both parts to use - don't toss out that fabulous buttermilk!!

Once your mixture has separated, pour off the buttermilk, and begin squeezing the solid butter to help it release more of the liquid in it. Continue to squeeze it to get water out as best you can. This will help it to "keep" better.

Once you're done squeezing, you can wrap it and store it in the fridge or freezer. I just kept mine in a lidded container in the fridge. If you used a raw milk from a good farm with healthy cows, you now have some great butter free of anything extra you might not want in there!!

Happy Cooking!

Read more...

Wooden Spoon and Fork

Friday, February 11, 2011


picklewart.blogspot.com

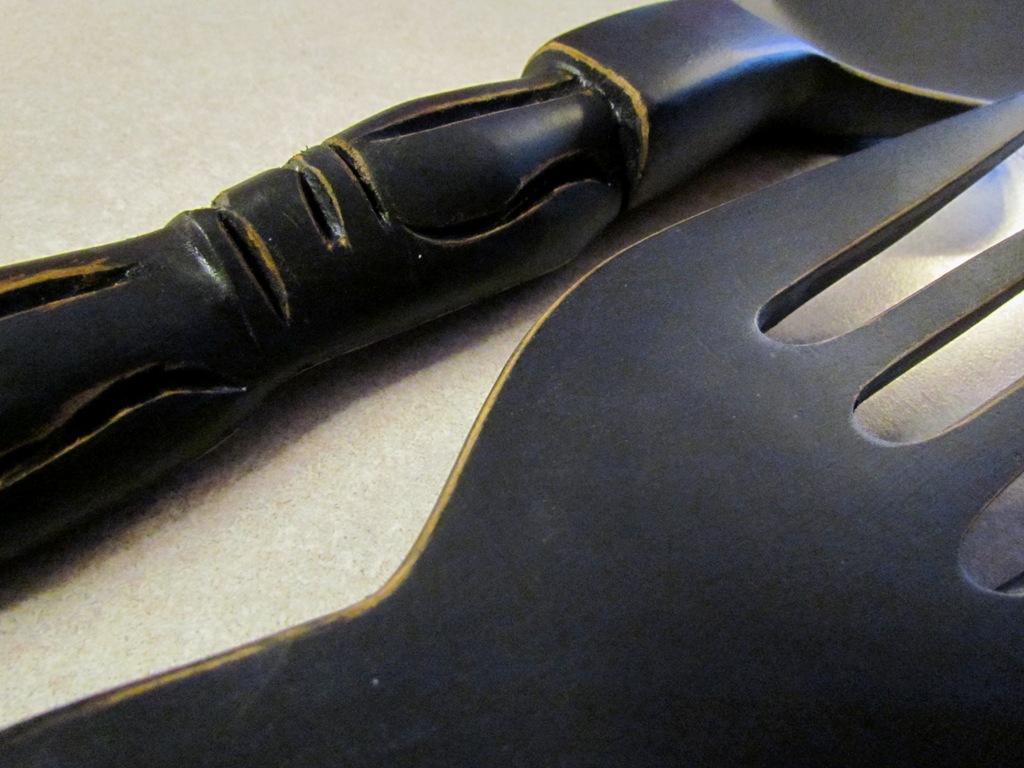
I found this old beat up giant wooden spoon and fork at a garage sale last year for $2. I knew then that I wanted them up on my kitchen wall... but they needed something more than just their current discolored beaten wooden look. So, I finally got around to digging out some black paint I had - about 4 years old might I add! (LOTS of stirring and shaking). I gave them a wipe down and started painting. When dried, I thought they looked great but maybe a little too "polished" for my country kitchen full of barn wood pieces and chicken paraphernalia so I distressed them a bit with a fine-grit sandpaper.

Now, I think they're PERFECT for my wall!

Read more...

Slave to the Grind

Monday, January 10, 2011

picklewart.blogspot.com

If you've never ground your own meat, you just don't know what you're missing out on. Once you get passed the raw meat smell, it's a great experience. You have complete control of your ground meat... what you put in it, how fatty it is, how you package it, etc. (not to mention the savings on having someone else do your processing for you.) I am a total and complete process-your-own venison convert.

Well, here's a quick overview on how it all goes down... first, kill something. Then, field dress it, hang it and then fridge it for about a week. Now the fun part... cut the meat off the bone. This task alone can be a few days depending on how many deer you took. Next, round up some fat trimmings from your local butcher... beef is fine but pork is even better!

Now for the real meat of the process (no pun intended)... grinding. Beg, borrow, or steal a grinder (ignore that last option). Before grinding away, consider what you will use your meat for: burger patties, meatloaf, spaghettie sauces, casseroles, chili, breakfast sausage... once you determine what you like best, I recommend the following mixes:
90 % venison/ 10% fat for anything that uses a crumbled meat (spaghetti, chili, etc.),
70% venison / 30% fat for anything that needs to hold together (burger patties, meatloaf), and
60% venison / 40% fat for breakfast sausage (this will use additinal seasonings when you do the final processing on those batches).

You may be thinking, "Oh no. That's too much fat. I want a nice healthy meat." Oh trust me honey, you've got the WORLD'S most healthy meat no matter how you mix it. Very lean venison cuts of meat, no antibiotics, no hormones, organic feed... and mixing in a little fat to add flavor and assist with cooking won't ruin that fact!!

So, once you've decided on your mixes, get going! Sanitize your counter, bowls, and grinder parts with a bleach water mix. I prefer to keep half of my sink filled with a dish soap water with bleach in it... makes cleaning as I go handy.

Sanitized now? OK - put your grinder parts back together and hit that On button! Feed in the proportioned amounts of meat and fat into the grinder. I recommend a first pass on a coarse grinding disk and a second pass on either the same coarse disk or a medium disk. I just find this texture to suit me better. Once you've made some passes through the grinder, you now have a nice big bowl full of ground meat to package up and put in the freezer. I go with white Reynolds wax-lined 150 sq ft of freezer paper purchase at my local big box store. I use a scale to measure out 1 lb portions, wrap them in the paper, use masking tape to secure the ends, and use a Sharpie-style marker to label them (90/10, 70/30...). Once I have a bowl done, into the freezer they go... and on to the next batch of grinding!

In my experience, one deer will take you 4 or 5 hours to grind and package if you're doing it yourself. Buddy up, and it goes even quicker!

Read more...

Home-made Dishwasher Detergent a BUST

Wednesday, September 29, 2010

picklewart.blogspot.com

Well, after a run of good luck with all the different home-made recipes I have here on the blog, I've hit a dead end. Home-made Dishwasher detergent is a bust. After a few different alterations to the chemistry of the detergent, I've finally decided this stuff just doesn't cut it. Washing a load of dishes twice isn't cost or time effective. So, my earlier post on making your own home-made dishwasher detergent is now just a try it if you want post... I'll be switching back to store bought until something else comes out for me to try!

Read more...

Homemade Dishwasher Detergent

Monday, September 20, 2010

picklewart.blogspot.com

I love to save. Yes, I do. I find much satisfaction in finding that incredible deal at a yard sale or flea market... that elusive 90% tag on a sale rack... or that make-it-yourself EASY recipe for cleaners. Myself and a few friends have been trying out various home-made cleaner recipes... some working well... others working not-so-well. Thus far, the home-made liquid laundry soap, fabric softener, stain spray, and various bathroom cleaners (concoctions of ammonia, vinegar, baking soda, and bleach [never mix vinegar & bleach!]) have all done very well.

So, now I'm ready to try my own home-made dishwasher detergent. A friend sent me hers because it was fogging up her dishes. I believe she too has hard water battles just as I do. I got hers to work OK if I used ONLY a tablespoon or LESS and also used vinegar as a rinse agent.... and I still experienced some "fog" on the dishes now and then. So, now I'm trying out another "recipe" for home-made dishwasher detergent. I'll give it a review after I've given this one a go.

Home-made Dishwasher Detergent

1 c Washing Soda (not Baking soda - sodium carbonate)
1 c Borax
6 pkts unsweetened Lemonade (like Koolaid) *citric acid

I ran the washing soda through my blender to really "powder"-it-up. Then I mixed all the ingredients up in a sealed container. I also through in one of those silicon packets (like found in purses & shoes) to help absorb moisture.
These mixes tend to clump, but it doesn't cause any issue other than having to break it up now & then.
Use 1 Tablespoon per load (no more).

Use vinegar as your rinse aid (instead of other store products)!

The vinegar helps to break up the hard water... the lemonade (citric acid) also helps to break up the hard water during the wash to help with a cleaner rinse.

Read more...

Home-made Bisquick - Cheap & Easy!

Monday, August 16, 2010

picklewart.blogspot.com

Do you use a lot of Bisquick? It's quick to make, easy to mix and store, and cheaper than purchasing it in the store. AND -- You can make your own and control what ingredients go in it... and it's not hard.

*If you prefer whole wheat flour like I do, so you could mix it ALL w/ wheat or go half in half with white.
*Watching your sodium? I use the fake salt potassium stuff instead of regular salt. They also make a half and half sodium/potassium mix.
*Sugar an issue? Swap some or all of the sugar for your preferred sweetener like Splenda or the latest favorite, Stevia.

Home-made Bisquick

10 C Flour
3/8 C Baking Powder
1 tsp Cream of Tartar
1 1/4 C Powdered Milk
1 1/2 TB Salt
1/4 C Sugar
1 lb Oleo (shortening - like Crisco)

Mix all together and store in an airtight container.
Lasts approximately one month.

Read more...

Summer Daycamp Swap

Saturday, August 7, 2010

picklewart.blogspot.com

I know it's getting late in the summer, but I read about the concept of a co-op.-style summer camp swap to do with your friends. Each friend takes a turn hosting a day of "summer camp" or "fall camp" or ANY season of camp for that matter! This idea greatly intrigued me. I have many Christian friends that I would feel very comfortable entrusting the care of my children to. As I look into it, the more I realize this could really become a blessing to both you and your friends! A break to do what Mom needs to do, a savings on the cost of a babysitter while you do it, and the opportunity to serve one another in a much-needed way!
So, here's what I'm finding as I go along:

  • Come up with a theme for the day. It will make it more memorable for the kids involved.
  • Agree on discipline ahead of time. Ex. Time-outs, corners, etc. with phone calls if it needs further attention.
  • Agree on no TV, movies, computer, etc. beforehand.
  • Define any age limits of children involved in the summer camp swap.
  • Address nap times. All children are different. As long as everyone knows ahead of time, any nap schedule can be accommodated.
  • Before adding new members to the rotation, discuss in private with the existing members before offering.

Below might be a timeline example of a Summer Camp Swap for preschool-aged children (older children could do longer days):

9 AM Drop-off - Coloring sheets while they settle in
9:15 Books, Songs/Music, Circle Time
9:45 Craft/Art
10:15 Outdoor Activity
10:45 Small snack
11:00 Free Play
11:30 Indoor Activity
12:00 LUNCH!
12:30 Indoor Activity/Free Play
1:30 Pick-up
(This schedule allows for PreK ages to go home for rest/nap times in the afternoon.)

I'm curious if any of you have ever done anything like this. I'd love to hear your thoughts and ideas!!
~Michelle

Read more...

Making Organic Affordable

Friday, July 30, 2010

picklewart.blogspot.com

Organic meat, eggs, cheeses, and produce is a wonderful thing. It's better for you and for the environment too. But it's not always better for your wallet. The struggle is trying to make healthier choices for your family while not doubling the grocery bill! How to make it all fit into your budget?

I found some recommendations on what produce is more "susceptible" to pesticides and what produce is a little safer to purchase without it being organic.

Here's the summary of recommendations from the Environmental Working Group and the Organic Center's dietary risk-index scores. The research bases the ratings on residual pesticides as well as the level toxicity of that pesticide.
The produce is listed in descending order of risk

Buy Organic As Often As You Can:

Cranberries
Peaches
Apples
Bell Peppers
Celery
Nectarines
Strawberries
Cherries
Kale
Lettuce
Imported Grapes
Carrots
Pears
Cantaloupe

The Cleaner Options:

Onions
Avocado
Corn
Pineapple
Mangos
Asparagus
Sweet Peas
Kiwifruit
Cabbage
Eggplant
Papaya
Watermelon
Broccoli
*Tomatoes
Sweet Potatoes

*I guess I have my own opinion on this though... the tomatoes. I feel like the thinness of the skin and the level of pesticides used in our particular area lends itself to make it worth it to buy tomatoes organic if possible.

Read more...

Practice with a Fondant Cake

Saturday, June 26, 2010

picklewart.blogspot.com

Garrett's 1st birthday is coming soon, and I decided this year that I would make his first cake using fondant... I guess that makes two firsts. I've been told home-made marshmallow fondant tastes sooooo much better than store-bought, and it's much cheaper too... especially if you're making a lot of it! Today was my first go and it went OK. Dyeing fondant seems to be the biggest challenge though (thus the tie dye pink ;-).

I used a home-made marshmallow fondant and here's how it goes:
*Grease counter with oleo (Crisco).
  1. Pour out 1/2 a bag of powdered sugar onto surface.
  2. In large greased bowl, pour a full bag of marshmallows (reg or min) and 1/2 Tbsp of water.
  3. Microwave in 30 sec increments stirring between until marshmallows melt (usually around 2 min).
  4. Pour melted marshmallow onto powdered sugar surface.
  5. Grease hands and knead. (This is a very messy process but also a little fun. Who doesn't love pla-dough!?)Work until pliable. If it becomes sticky, add more powdered sugar).
  6. Roll into ball, grease the ball with oleo, and wrap in saran wrap.
  7. Refridgerate to firm 4+ hours.
  8. Buttercream crumb-coat your cake before laying on fondant. Refridgerate an hour or so. When you remove, rub the edges to remove any excessive roughness.
  9. Roll to 1/4" thickness to lay over cake.
  10. Lay over cake. Gently rub and pull down to smooth out the sides from overlap. Trim bulk to aid in this process. Set aside bulk for dyeing later.
  11. To dye, knead the heck out of it with your gel dye (or reg dye). This will seem neverending. Mine never really did become a smooth color!

Below are pictures from our process:

Some handy tools to have around.

Sorry, no pics of MY fondant process... too messy. But here's the finished product ready to go to the fridge. Here's the YouTube How to video link I used though: http://www.youtube.com/watch?v=p9rlJeJsJR0


My favorite icing... Wilton's Buttercream below - for my filling and crumb coating above.
Grace picks out the practice cake colors. Pink and green of COURSE!
My white base layer of fondant layed on and tucked in around the 9" double layer cake.
Grace helped out cutting shapes and rolling balls!

The finished product:

Ready to eat!!

Read more...

Home-Made Stain Remover - EASY!

Thursday, May 27, 2010

I've been waiting to run out of my Shout spray so I could try my new home-made version of stain spray. Well, it's finally happened. The Shout bottle is empty!

Home-made Stain Remover
1 part ammonia
1 part water
1 part dish soap

Simple. Simple. Simple.
Mix all three ingredients and pour in a spray bottle. (I re-used my Shout bottle - extra green!)
I started with 1 cup of each. I guess you could make up larger batches and store them in old rinsed-out bleach bottles or milk jugs to use for refilling later as well.

Happy savings!!

Read more...

So how did it REALLY work, you ask?

Wednesday, May 5, 2010


This is an update to my previous posts regarding some of the make-your-own products. Awhile back I made laundry detergent (the liquid version) and fabric softener. Since I've had a few inquiries as to how it worked out, I thought I'd post it out here as an update.
I have to say, the liquid detergent has worked remarkably well thus far (I ended up adding some essential oil of orange). We've been using several weeks now without any issues. The fabric softener works fine, but I'll admit, I do miss the smell of Snuggle and Downy. But functionally, it has worked just fine.
My next project will be to make my own stain remover and dishwasher detergent. As soon as I get low on my store-bought brands of those, I'll whip up some batches and post the "recipes" and instructions... and a review later of course...
because who cares how much money you save making your own stuff if it doesn't work, right?!

Have fun coming up with your own "recipes" and let me know if you have any ideas!!

Read more...

I finally made my own laundry detergent and fabric softener!

Tuesday, April 6, 2010


From my previous post , I had posted recipes on how to make your own laundry detergent and fabric softener. Well, I finally made it here and tried it, and I have to say, it works GREAT! See the previous post for exact steps, but here was the gist of how I did it.

*I made a double batch and used a 5 gallon bucket with lid to store it. I plan to use my existing store-bought laundry detergent spout container as a refill bottle.

I ended up using a whole bar of ivory soap for the double batch (instead of 2/3). I grated it into my large pot. Then I took the pot and added the water as listed in the recipe and heated it until the soap disintegrated and melted down. Once there, I added the powders and stirred until dissolved on the stovetop. Once I was to this point, I then transferred the liquid mixture to the 5 gallon bucket to add the amounts of water to further mix in (again, all were doubled). Final outcome was a well dissolved liquid (soon to be more like a liquid-gel) that worked well with our hard water out here. My first load of laundry with it did quite well.

I also made up a single batch of the fabric softener and stored it in a well-rinsed old bleach bottle that was labeled with "Fabric Softener" and also had the recipe written ON the bottle to make it easier to fix up a batch later when I run out.

All in all, it was incredibly easy and for $0.72 to make a 64 load amount of detergent (mine was actually a double so it's more like $1.44 to make 128 loads), that is some SERIOUS savings!

Read more...

An 80 Degree April Day Outside

Thursday, April 1, 2010

Days like this remind me why we moved out here. The kids and I have been hanging laundry on the line this morning. I love the smell of line-dried laundry. It has a clean smell and a fresh crisp that cannot be attained in a dryer! But one of my favorite things about line-drying the laundry is looking out and seeing tiny little clothes flapping in the breeze... tiny little pajamas... tiny little socks... and even tiny little gloves!


Awhile back I posted that we lost our flock leader, Ginger. Well, I believe another hen has stepped up to take her place. It's amazing. Nature just fills the void. This hen, and I am not exaggerating, naturally - in the void of a leader, took on a different appearance. Her comb grew larger, her feathers deepened in their red color, she got bigger, and her voice even deepened. I've not named her yet, but she really is the little red hen around here!

Read more...

Homemade Baby Wipes for $0.60 a Roll!

picklewart.blogspot.com
I've had friends tell me about this homemade tip before, but I'd never done it. And now, I don't know why I hadn't! Making homemade baby wipes really was easy.

What you need:
Quality paper towel roll (Bounty, etc.)
Baby Wash
Water
Round appropriate size container with lid
*I chose to invest in the well-designed 2.9 qt Michael Graves container from Target. Well worth the $12, and the cost will be recuped in just a few batches!!

Cut paper towel roll in half with a sharp knife... or, next time, I'll cut it in half with the miter saw... it would've been easier, quicker, and a cleaner cut!

Place half of paper towel roll in round storage container.

In separate bowl or container, mix 2 C water and 2 Tbsp baby wash. (Since you pick your own baby wash, you could use an organic or all natural substitution here to suit your needs.)

Pour liquid mixture over paper towel roll in round container and let soak about 5 minutes.

Return and pull the cardboard core out after soaked. This should also pull up the middle towel as you pull it out. This is your pull point for pulling out baby wipes! Done!


*There are some tips that recommend using a container with a soft lid allowing you to cut an 'X' slit in the top to pull the towels through, but this can also cause your wipes to dry out quicker inside, so I went with a quality, well-designed, easy-to-use lid!

Read more...

Is There Anything Vinegar Can't Do?

Wednesday, March 31, 2010


Vinegar: The SUPER Ingredient to Economical, Environmentally Friendly Cleaning!

I found the below list of vinegar tips here:

White distilled vinegar is a popular household cleanser, effective for killing most mold, bacteria, and germs, due to its level of acidity. Cleaning with white distilled vinegar is a smart way to avoid using harsh chemicals. You'll also be glad to know that it is environmentally friendly and very economical.
To shine chrome sink fixtures that have a lime buildup, use a paste made of 2 tablespoons salt and 1 teaspoon white distilled vinegar.

Make your own scouring cleanser by combining 1/4 cup baking soda with 1 tablespoon liquid detergent. Add just enough white distilled vinegar to give it a thick but creamy texture.

Clean counter tops and make them smell sweet again with a cloth soaked in undiluted white distilled vinegar.

Clean and deodorize a drain by pouring in 1 cup baking soda, then one cup hot white distilled vinegar. Let this sit for 5 minutes or so, then run hot water down the drain.

Deodorize the garbage disposal by pouring in 1/2 cup baking soda and 1/2 cup hot white distilled vinegar. Let sit for 5 minutes then run hot water down the disposal.

Deodorize and clean the garbage disposal with white distilled vinegar ice cubes. Make them by freezing full-strength white distilled vinegar in an ice cube tray. Run several cubes down the disposal while flushing with cold water.

Clean the microwave by mixing 1/2 cup white distilled vinegar and 1/2 cup water in a microwave-safe bowl. Bring it to a rolling boil inside the microwave. Baked-on food will be loosened, and odors will disappear. Wipe clean.

Clean the shelves and walls of the refrigerator with a half-and-half solution of water and white distilled vinegar.

Cut the grime on the top of the refrigerator with a paper towel or cloth and full-strength white distilled vinegar.

Avoid the bad smell when you heat up a newly cleaned oven by using a sponge soaked in diluted white distilled vinegar for the final rinse.

To clean a grease splattered oven door window, saturate it with full-strength white distilled vinegar. Keep the door open for 10 to 15 minutes before wiping with a sponge.

Remove soap buildup and odors from the dishwasher
by pouring a cup of white distilled vinegar inside the empty machine and running it through a whole cycle. Do monthly.

To prevent good glassware from getting etched by minerals
, wash then spray with full-strength white distilled vinegar. Give the glasses a hot water rinse before letting them dry or drying them with a towel.

For cloudy glassware, soak paper towels or a cloth in full-strength white distilled vinegar and wrap around the inside and outside of the glass. Let sit awhile before rinsing clean.

Get rid of lime deposits in a tea kettle by adding 1/2 cup white distilled vinegar to the water and letting it sit overnight. If more drastic action is needed, boil full-strength white distilled vinegar in the kettle a few minutes, let cool and rinse with plain water.

Remove mineral deposits from coffee makers with white distilled vinegar. Fill the water reservoir with 1 cup or more of white distilled vinegar and run it through a whole cycle. Run it once or twice more with plain water to rinse clean. (Check the owners' manual first. I know our BUNN does NOT recommed doing this!)

Remove stains from coffee and teacups by scrubbing them gently with equal parts of salt (or baking soda) and white distilled vinegar. Rinse clean.

For stained and smelly plastic food containers, wipe them with a cloth dampened with white distilled vinegar.

Remove odors from a lunch box by placing inside a slice of bread that has been soaked in white distilled vinegar. Leave overnight.

Remove ugly film in narrow-necked glass jars, flower vases, and bottles by letting undiluted white distilled vinegar sit in them for a few hours. Add a little rice or sand and shake vigorously to loosen stubborn stains. Repeat if necessary.

To clean tarnished brass, copper, and pewter, use a paste with equal amounts of white distilled vinegar and table salt.

Make a metal cleanser by adding enough white distilled vinegar to 2 tablespoons of cream of tartar to make a paste. Rub it on and let it dry on the surface. Wash it off and dry with a soft cloth.

Polish brass and copper with a mixture of 2 tablespoons of ketchup and 1 tablespoon white distilled vinegar. Rub it on with a clean cloth until dry and shiny.

Remove dark stains on an aluminum pot by boiling a mixture of 1 cup white distilled vinegar and 1 cup hot water.

Discourage ants by spraying undiluted white distilled vinegar outside doorways and windowsills, around appliances and wherever you find the pests coming in.

Get rid of fruit flies by setting out a small dish of undiluted white distilled vinegar.

Clean the wheel of a can opener using white distilled vinegar and an old toothbrush.

Remove the smell of spoiled food from a refrigerator by first rinsing the area with soap and water. Spray surfaces with full-strength white distilled vinegar and wipe them down with a damp cloth or sponge. Fill some containers with baking soda and place inside. Close the door and leave for a few days.

Wipe grease off exhaust fan grids, the inside of your oven, or anywhere grease gathers with a sponge soaked in white distilled vinegar.

To make cleaning the grill easier, spray a solution of half water and half white distilled vinegar on the cooking surface.

To remove a label, decal, or price tag, cover with a cloth soaked in white distilled vinegar. Leave the cloth on overnight and the label should slide off.

Renew sponges and dishrags by placing them in just enough water to cover them. Then add 1/4 cup white distilled vinegar. Let them soak overnight.

Get rid of calcium deposits on faucets by soaking a cloth or paper towel in white distilled vinegar and wrapping the area tightly. Let this sit for a couple of hours or overnight.

Remove soap buildup from faucets by scrubbing them with a solution of 1 part salt to 4 parts white distilled vinegar.

Rid a faucet of lime deposits by tying a plastic bag containing 1/2 to 1/3 cup of white distilled vinegar around it and leaving it there for two or three hours. If mineral deposits don't wipe off, scrubbing with an old toothbrush should complete the job.

Shine colored porcelain sinks by scouring them with undiluted white distilled vinegar.

Rinse away soapy film on countertops with a solution of white distilled vinegar and water.

Clean grout by letting full-strength white distilled vinegar sit on it for a few minutes and scrubbing it with an old toothbrush.

Kill germs all around the bathroom with a spray of full-strength white distilled vinegar. Wipe clean with a damp cloth.

To remove grime, mildew, and scum from the tub, tile, shower curtain or door, wipe with undiluted white distilled vinegar. Rinse with water.

Spray shower doors with full-strength white distilled vinegar after you've squeegeed the glass, or before you step in and turn on the water. It will help release the hard water deposits so they don't remain on the glass.

Mix up an inexpensive tile cleaner by adding 1/2 cup baking soda, 1 cup white distilled vinegar, and 1 cup ammonia to a gallon of warm water.

Get rid of stubborn bathtub film by wiping it with white distilled vinegar and then scouring with baking soda.

Soak a sponge or loofah overnight in a strong white distilled vinegar and water solution to remove dirt and slime. Rinse several times with cold water and let air dry (in the sun if possible).

Clean shower door tracks by filling them with white distilled vinegar and letting it sit for a few hours. Pour hot water into the tracks and wash and scrub away the scum with a toothbrush.

To clean a scummy showerhead, pour 1/2 cup baking soda and 1 cup white distilled vinegar into a sandwich bag and tie it around the showerhead. Let this set for an hour after the bubbling has stopped. Remove the bag and then turn on the water.

Deodorize the toilet bowl by allowing 3 cups white distilled vinegar to sit in it for about a half hour before flushing.

To make the toilet bowl sparkle, pour in a cup or more of diluted white distilled vinegar and let it sit several hours or overnight. Scrub well with the toilet brush and flush.

Freshen air in the bathroom by spraying into the air a solution of 1 teaspoon baking soda, 1 tablespoon white distilled vinegar, and 1 cup water.

Get a shining finish on a no-wax vinyl or linoleum floor by cleaning it with a solution of one cup white distilled vinegar for every gallon of water.

Apply full-strength white distilled vinegar directly to tough linoleum stains. Leave it on for 10 to 15 minutes before wiping it up. If that doesn't work, apply white distilled vinegar again and then sprinkle some baking soda over the white distilled vinegar. Scrub the area with a brush or sponge. Rinse clean with water.

For an economical and environmentally friendly floor cleaner, mix a solution of 3 drops dishwashing liquid to 1/3 part white distilled vinegar, 1/3 part alcohol, and 1/3 part water. Spray sparingly and mop for a fast clean-up.

Some carpet stains can be removed with a paste of 2 tablespoons white distilled vinegar and 1/4 cup salt or baking soda. Rub into the carpet stain and let dry. Vacuum up the residue the next day. (Always test on an out-of-sight part of the carpet first).

Bring out the color in carpet by brushing it with a solution of 1 cup white distilled vinegar for every gallon of water. (Always test on an out-of-sight part of the carpet beforehand).

To reduce soap bubbles in a steam cleaner add about 1/4 cup white distilled vinegar. Use the same amount in the rinse water to remove detergent residue and make carpets stay fresh longer.

Wash indoor/outdoor carpet with a solution of 1 cup white distilled vinegar in 1 bucket of warm water. Scrub using a brush or a broom and then hose off.

Clean up pet accidents by first blotting up the area and then adding a white distilled vinegar-and-water solution. Blot until it is almost dry. Then sprinkle baking soda over the area and let it dry. Vacuum up the residue the next day.

Create your own window cleaning solution by combining 1/2 cup non-sudsy ammonia, 1 cup white distilled vinegar, and 2 tablespoons cornstarch in a gallon of water.

Remove the wax residue left by commercial window cleaners with a solution of 2 cups water, 1 cup white distilled vinegar and 1 teaspoon of liquid soap or detergent.

To remove paint from windows try using undiluted, hot white distilled vinegar. Give the solution time to soften the paint before removing with a razor edge tool.

To remove paint splatters from windows apply full-strength white distilled vinegar with a clean paintbrush.

Get rid of mildew, dust, and stale odors by wiping down walls with undiluted white distilled vinegar on a cloth or a sponge mop.

Clean woodwork and walls with a mixture of 1 cup white distilled vinegar, 1 cup baking soda, 1/2 cup ammonia and 1 gallon warm water. Wipe on with a sponge or damp—not wet—towel.

Clean wood paneling with a solution of 1/4 cup olive oil, 1/2 cup white distilled vinegar, and 2 cups warm water. Wipe on with a soft cloth.

Remove wallpaper easily by using a paint roller to wet the surface very thoroughly with a solution of equal parts white distilled vinegar and hot water. Or spray on until saturated.

Get decals off walls or doors by letting undiluted white distilled vinegar soak into them for several minutes before trying to peel them off. Repeat if necessary.

Remove white water rings from wood with a solution of equal parts white distilled vinegar and vegetable oil. Rub with the grain.

Remove fireplace soot and grime with undiluted white distilled vinegar. Use a brush to scrub and a towel to blot up the wetness and dirt.

Clean fireplace glass doors with a solution of 1 part white distilled vinegar to 2 parts water. Spray or wipe on, then wipe clean with a dry cloth.

To kill germs, spray full-strength white distilled vinegar on doorknobs and then wipe them dry.

Remove the smell of a dead mouse or other rodent (after removing all animal remnants) by wiping down the area with either white distilled vinegar or bleach. Then place a fabric softener sheet in the area to remove any lingering odors.

Never use white distilled vinegar on marble. The acid can damage the surface.

Before painting old concrete, clean with full-strength white distilled vinegar. Let it air dry.

Clean hardened paint brushes by simmering them in a pot with white distilled vinegar. Soak them first for an hour before bringing the white distilled vinegar to a simmer. Drain and rinse clean.

Remove mud and stains from plastic, fiberglass, or aluminum sports equipment by applying a paste of 1 part white distilled vinegar to 3 parts baking soda. Wipe off with soapy water and rinse with clear water.

Clean your grill by spritzing white distilled vinegar over wadded up aluminum foil and scrubbing the grill vigorously with it.

To remove film in glass baby bottles, fill with equal parts hot water and white distilled vinegar. Let sit for at least an hour. Scrub with a bottle brush.

To clean and disinfect baby toys add a good-sized splash of white distilled vinegar to soapy water.

Clean vinyl baby books or board books by wiping with white distilled vinegar. Wipe clean with a damp sponge or cloth.

Clean scissors that have become sticky (after cutting tape, for instance) with a cloth dipped in undiluted white distilled vinegar.

Clean and deodorize urine on a mattress with a white distilled vinegar and water solution. Then sprinkle the area with baking soda and let dry. Brush or vacuum the residue after it is dry to the touch.

Shine pennies by soaking them for a couple of hours or overnight in a glass or bowl of undiluted white distilled vinegar.

Read more...

Homemade Laundry Cleaning Products

Saturday, March 20, 2010


I've been trying to do a little more around here to be both more eco-friendly as well as being more frugal and being a better steward of the finances God has given us.
In my quest to find practical realistic remedies that the average person would have time to attempt, I found some recipes for homemade laundry products that seemed simple enough for anyone to make and cheap and efficient as well. I plan to try these out over the next few weeks.

After searching for different product recipes, I discovered there are a few ingredients that are used over and over again in these cleaning products. Vinegar (the #1 ingredient and your new best friend), Baking soda (for refreshing and scrubbing), Ammonia, Washing Soda & Borox (frequently used in laundry).

Homemade Laundry Stain Removers

1 part ammonia
1 part dish soap
1 part water

Mix and shake in spray bottle. Mix up in small or large batches - whatever is more convenient.
Spray stain, let sit a minute, scrub under hot water & toss in washing machine.

This takes your stain remover costs down from $3.00 a bottle to $.30 a bottle!

Another stain remover recipe I found interesting was:

1 Cup hot water
1/2 Cup Baking soda
1/2 Cup Hydrogen Peroxide

Mix and shake in spray bottle. Spray stain & let sit overnight before laundering.

Homemade Laundry Detergent

I found this website with an excellent description of how to make your own laundry detergent.

Basically the indgredients are grated bar soap, Borax, and Washing soda.

This author says that the recipe makes a 64 load batch for only $.71! That's incredible savings!

*If you have very hard water like us, you may want to add baking soda (1/2 C), Oxyclean, or vinegar to your washing machine loads. If you experience issues with residues, try a vinegar rinse - vinegar in one of those Downy balls works great.

**Vinegar and bleach do NOT mix well. Chemical reactions between the two can be ugly.

Homemade Fabric Softener

2 Cup Vinegar
2 Cup Baking Soda
4 Cups Hot Water

Slowly mix water, vinegar, and baking soda. They tend to foam. Gently rock in a capped botttle and then release built up air. If you want scented softener, add about 20 drops of essential oils. Some clean smells would be cedarwood, lavendar, eucalyptus, or rose.

Read more...

Free Financial Peace University Lesson from Dave Ramsey

Friday, March 12, 2010

That's right. Dave's philanthropy is surfacing! They're offering a free lesson to those that register at this link. They'll email you a list of locations they plan to visit & then you can choose we're you would like to attend their event. FREE. It's a gift to the communities! I've signed up but haven't received the location list yet. I hope they come somewhere close to SW MO!!

Read more...

Saturday Spring Cleanup

Sunday, March 7, 2010

We took advantage of our beautiful Saturday 60+ degree weather and got a little done around the farm. Grace and Daddy had fun raking the leaves off the blueberry bushes and making GIGANTO piles for jumping. Now that was some serious fun! Grace even helped add old coffee grinds to the blueberry pits to help acidify the soil for the coming growing season (great GREEN cheap way to do this!). She's such a good little gardener. I can't wait for spring. I know she'll be my big helper in the big garden.


We also cracked open a few of our white chicken's eggs for breakfast. I was so impressed with the height of the yolks, I had to take a picture. My "ladies" must be eating good to be laying such high quality eggs this early in the season. Yeah for bugs!

Read more...

Always Looking to Save a Buck

Saturday, February 6, 2010


-- Money's tight... especially right now. I've been laid off since before Christmas, so we're always on the lookout to save money here and there. You may not have anyone in your home "laid off" or out-of-work, but I think we're all being much more frugal these days. When we started looking at our budget, we had some big decisions to make. Where could we cut back? We were already living pretty darn lean since I had already left a very good full-time programming job for a part-time position. I kept thinking, there's not a whole lot left to cut back on! We live in the country, so our chickens and our garden help quite a bit with our grocery expenses (as well as Courtney's hunting when he's successful), so there's not a whole lot there to cut. I already cook 3 meals a day from scratch most of the time! Where else... where else... we could drop our TV service. Oh mercy. That sure brought up a "discussion". I'll admit it, I'm a network TV viewer, so for me, it wasn't such a big deal. My hubby, on the other hand, enjoys The History Channel, The Discovery Channel, and The Learning Channel... all NOT freebies. Well, after much deliberation and a trial period currently going on, we decided we'll try the scenario of having an antenna for network stations and then just link up our laptop or Vaio media tower and use services like Netflix and the freebie, Hulu to bring in some of the other much wanted shows and movies we both enjoy. Initially, we'll have to invest in the purchase of a large antenna to make this happen though. Like I said, we're just trying it right now... we've not cancelled our DirecTV yet - oh but I do believe it's coming! We'll save about $652 a year!! Right now, we're running both "systems" side-by-side until we determine if it will meet our needs - well, "needs" so to speak anyway.
I'll let you know how it goes!

Read more...

Make Your Own Baby Food - Save Tons of $$!

Sunday, January 31, 2010

picklewart.blogspot.com


Awhile back I had posted on my Facebook wall about making homemade baby food. I actually had a lot of inquiries about this process.

First of all, I would just like to point out the financial benefits of making your own baby food. I bought organic carrots (full-size) for $.88 at Walmart. I have made it with the organic baby carrots ($1.94) but have since discovered they're not necessary. The full size are just as good, cook nicely, are just as organic, and cost less than half the price (no, I don't peel them, I just chop the ends off)! One bag of carrots made up a batch of 8 jars of baby food (this is based on the stage 2 size medium jars). If you buy jars of organic baby food, you'll pay approximately $.80 a jar (That's $6.40 for 8 jars of organic baby food) . Regular baby food can be bought for around $.56 a jar (That's still $4.48 for 8 jars of regular baby food!). In either case, when you do the math, by making organic, in this case carrot, baby food, you save $5.52!

Second, making baby food is simple, simple, SIMPLE. It's simply a process of first preparing the vegetable for cooking... removing peels (sweet potato), straining out thicker bits if preferred (post-pureed peas), cooking in a bit of water (I microwave but you could steam as well), and pureeing in your blender with a touch more water. It took me far longer to let the carrots cook on their own in the microwave than it did to prep them and puree them. EASY! Then, the last step is to store your baby food. I've heard of freezing it in ice cube trays, but I prefer to reuse baby food jars and freeze in the jar. (I have plenty of jars since I don't prepare ALL my baby food. You may find that some fruits are not cost effective...) Something you'll notice from the picture is my orange spoon... you might prepare yourself for some stained utensils when taking on the pureeing process. There's something about pureeing brightly colored foods that lets them stain things... I have a sacrificial spoon I use when doing this. Other than that, making your own organic or even regular baby food is a breeze and well worth the time!

Read more...
Related Posts with Thumbnails

I Wanna Read!

  • The Way They Learn - Tobias
  • Teaching the Trivium - Bluedorn
  • The Well-Trained Mind
  • Get Wisdom! - Ruth Younts
  • Little House on the Prairie series - Laura Ingalls Wilder
  • The Pursuit of Holiness - Jerry Bridges
  • Primal - Mark Batterson
  • Hipster Christianity - Brett McCracken
  • Gospel Powered Parenting - William P. Farley
  • Five Things Every Christian Needs to Grow - RC Sproul
  • When People are Big and God is Small - Edward T. Welch
  • Chosen by God - RC Sproul
  • The Discipline of Grace - Jerry Bridges
  • Radical - David Platt

Reading it Now!

  • The New Read-Aloud Handbook - Trelease
  • Honey for a Child's Heart - Gladys Hunt
  • Little House in the Big Woods - Laura Ingalls Wilder
  • Bringing up Boys - Dr James Dobson

Past Reads

  • The Three R's - Ruth Beechick
  • Mary Pride's Complete Guide to Homeschooling
  • What is a Healthy Church? - Mark Dever
  • What is a Healthy Church Member? - Thabiti M. Anyabwile
  • Feminine Appeal - Carolyn Mahaney
  • Shepherding a Child's Heart - Ted Tripp
  • Crazy Love - Francis Chan
  • When Life is Hard - James MacDonald
  • Food and Love - Dr. Gary Smalley
  • For Women Only - Shaunti Feldhahn
  • For Men Only - Jeff and Shaunti Feldhahn
  • The Gospel for Real Life - Jerry Bridges
  • Living the Cross Centered Life - CJ Mahaney
  • Captivating: Unveiling the Mystery of a Woman's Soul by John and Stasi Eldredge
  • Wild at Heart: Discovering the Secret of a Man's Soul - John Eldredge
  • Dare to Discipline - Dr. James Dobson
  • The No-Cry Sleep Solution - Elizabeth Pantley
  • Parenting is Not for Cowards by Dr. James Dobson
  • The Case for Christ by Lee Strobel
  • The Strong Willed Child by Dr. James Dobson

  © Blogger template Foam by Ourblogtemplates.com 2009

Back to TOP